Apache server is the popular web server software. Apache software foundation has founded and developed the apache software foundation. Being an open-source web server, Apache had gained its popularity rapidly. The software is available for free and is used by about 67% of web servers worldwide.
On top of all, Apache had been used by most of the WordPress hosting providers, even though they had numerous other web server options. Most of the big firms, including Cisco, IBM, Adobe, Xerox, LinkedIn, Facebook, AT&T, eBay, and others, are using the Apache webserver.
Why is the Apache server preferred most?
Apache web server is one of the former web servers, and it is founded in the year 1995. Similar to the other web servers, it has its perfect backbone role in serving the files to the visitors of your website.
The server is highly efficient, fast, and secure. It could adapt to any environment with its extensions and modules. Apache server has been used by various cPanel hosts too.
From handling the communication of your website to cleaning the memory, caches, and modules, Apache has several functions. The software web server is easy for beginners due to its regular updating feature.
How does Apache server work?
It is a complicated question to describe how the server works. However, the primary responsibility of the Apache server is to acknowledge the request from the clients and also reply them back with the response. In short, its primary usage is to maintain a connection between a server and website browsers such as Google Chrome, Firefox, Safari and others.
As it is a cross-platform web server, Apache is supported by both UNIX and Windows servers. This web server also responsible for handling Multi-processing modes (MPM) or mod_ssl to enable SSL v3 and supports TLS.
Some of the features in Apache are:
.htaccess
IPv6
FTP
HTTP/2
Perl, Lua and PHP
Bandwidth throttling
WebDAV
Load Balancing
Rewrite URL link
Track sessions
Use IP address on Geolocation
Apache Vs. Nginx:
NGINX is another webserver application founded in 2004. Despite the popularity of Apache, when you search properly, you can find that NGINX is increasing in the usage than Apache. If a website has encountered over traffic, it may cause performance issues while using Apache, but it won’t be affected in case of NGINX.
Apache’s role in most trafficking site as:
27.1% of the 100000 popular sites
21.5% of the 10000 popular sites
16.2% of the 1000 popular sites
While the NGINX role in most trafficking site is:
56.1% of the 100000 popular sites
63.2% of the 10,000 popular sites
57% of the 1000 popular sites
Here, you can predict the lower performance of Apache when compared with the other web server, NGINX.
How to find what web server you are currently using?
Now, if you want to check the webserver you are using among Apache and NGINX, you should often look into the website’s HTTP header. The steps include in this process are,
Click on the Network tab in Chrome developer tools.
You can use either Pingdom or GTmetrix.
However, some services like Cloudflare may not support this process.
Apache would help to run the hassle-free website service. It is the perfect choice for everyone from small business to more massive entrepreneurs who need to build their website. Moreover, this server works with numerous management systems, web frameworks, and programming languages. Hence, we can’t deny that Apache is the best web server for all types of web hosting platforms.
After building a website for your business, what will be the next step? Yes, you are right. You should create a Professional Email Address for yourself with your domain name. Have you thought about the need for a professional email address? Creating a professional mail address would be trustworthy for your other business clients and customers.
About Professional Email Address?
Unlike regular email id, you need to create a professional email with your business or firm name. If your option is to start a business on ‘music,’ you can create your mail id as [email protected] will be your professional email id. Email plays a significant role in the growth of your business. If you fail to communicate with your customers through the mail, then it might affect your business.
Imagine the same mail address created by using the free email services from Google mail. It will be [email protected], and it doesn’t look professional, which would fail to maintain trust among your clients.
What are the steps to create your professional email address?
You can use your own Gmail professional email address with G Suite or Google’s productivity suite. If you are surprised how you could do it, we have listed the complete instructions on creating your custom branded professional email address with Gmail and G Suite.
Before creating your email address, you should get a domain name and your website. Once you get them, you can follow our step by step guidelines on having your professional email address.
Why is G Suite used for creating a Professional Branded Email address?
Nowadays, you can find numerous WordPress hosting companies are providing various options to create your email account with your domain name. However, most of them are not reliable, isolated, got many restrictions, and not secure. Sometimes, you won’t be notified of the received message from your clients. While sometimes, you can’t be assured whether your mail had been delivered to the mail account of your customer.
To get rid of these annoying situations, you can opt for G Suite and Gmail. Gmail would only helpful in creating a general email address while the G suite with Gmail is beneficial in allows you to form your own branded email address for professional use.
What do you know about Gmail and G Suite?
Gmail is the leading email industry among all other services, with 1.5 billion active users per month. G Suite comes in as Google’s productivity app suite designed especially for the business owners and entrepreneurs. Gmail is also included with this G suite and is used by both business persons (more than four million users) along with students and faculties (over 80 million users).
What is the application of G Suite and Gmail?
Making a professional mail address for your business with the help of G Suite and Gmail has come with various benefits. Some of them are,
It is possible to create the professional mail id with your domain name.
Gmail provides high profile security.
Gmail allows filtering of spam messages.
The storage of your mail account created by using G suite will be 30 GB which is double the level of mail account created by using Gmail alone.
Even though you are in offline mode, you can control the mail system via the Gmail app on your mobile.
It allows us to work anywhere and anytime with the web, mobile or tablet.
Every user had given access to 30 email aliases.
It is highly supported by the Outlook and allows synchronization with the outlook accounts.
With your professional mail address, it is quite easy to utilize the Google calendar, Google Hangout to chat, video call and voice call with your clients.
It is free of advertisements and doesn’t require professional support all the time.
It Doesn’t turn to the spam folder, efficient mail delivery with no delay.
What is the process of creating a professional Email with the help of G suite?
Here, we had explained the process of creating your professional mail address using G suite step by step,
Step 1: Sign up into a G Suite account by providing the necessary information.
Step 2: Then go to the G suite website and select the ‘Get started’ option.
Step 3: Now, you can select your plan.
Note: The price of the account will be $5 /month for a user. But if you go for a year, it will be $50 for a year where you got a discount for two months. However, if you are not convinced, you can use 14-day trial use provided by G Suite. During the period, you can check its features and advantages, including Gmail, Drive, Calendar, and others.
Step 4: On the next page, you should insert the name of your business, enter the number of employees, and the name of your country.
Note: In case, if you need the account for yourself alone, then you can choose ‘just you’ instead of selecting the number of employees.
Step 5: Tap on the ‘next’ button for further actions.
Step 6: In the next level, you should enter personal information such as your name and email address.
Step 7: Now, you have to choose your domain name. In this step, you can either select ‘Yes I have one I can use’ (if you already have your domain name) or ‘No, I need one’ if you yet to create your domain name.
Note: If you are up to create a new domain name for yourself, then you should pay separately for the process. If you have already had one, then you will be asked to undergo the verification process of the same.
Step 8: Once done with the domain name, you can now create your account by inserting a username and secure password.
Note: Choose your username with utmost care as it will be shown as your professional name.
Step 9: Now, you had completed the process of creating your G suite account. Then, choose ‘Go the Setup’ option.
Step 10: You will be navigated to the Setup screen. Here, you need to add other people to the account.
Note: In this step, you can create Gmail accounts for your employees or the whole department. You are also allowed to add members now, and then you can insert their email address later whenever you want.
Step 11: If you don’t want to add any members you can select the ‘I have added all user email addresses’ and hit on the ‘Next’ option.
Step 12: In the next level, you will be asked to verify your ownership of the given domain name.
Step 13: Later, you can view the HTML code snippet where you can add your website.
Note: Apart from this option, you can also prove the one by uploading an HTML file to your site. It can be done through an FTP client app in the hosting account.
In the absence of a website, the MX record method can also be used. Once you begin the process, you can easily continue the further steps.
Step 14: In case, you have an HTML code snippet in WordPress, change to the WordPress admin area in a new tab. Insert Headers and Footer plugin options should be installed.
Step 15: Once you activated the account, you can find the Insert and Footer page under the settings option.
Step 16: Here, you can paste the already copied HTML code from G suite, which is located below the ‘Scripts in Header’ section.
Step 17: Hit on the ‘Save’ option to store the changes made in the settings.
Step 18: Then return to the G Suite Setup section and select the tap on the checkbox option mentioned with ‘I added the meta tag to my homepage.’
Step 19: Then you should insert the MX record entries for the domain name.
Note: MX records should be only added if you have domain name and website already. But it is not needed if you create it using Google.
Note: As you didn’t create your domain name using Google, then the emails will move to the domain name instead of the Google servers.
Step 20: Hence, MX records should be changed on the domain name, and then you can receive your business emails on your Google servers.
Step 21: To continue with the process, you need to login to your hosting account
Step 22: You should add MX records in Bluehost where you should locate the DNS settings under your domain name.
Step 23: To do this, first enter into your Bluehost account dashboard and tap on ‘domains’ options.
Step 24: In the next level, you should select your domain name and click on the Manage button, which is present near the ‘DNS Zone Editor’ option.
Step 25: Here, you can open your DNS Zone Editor in Bluehost where you can return to G suite set up screen.
Step 26: Now, select the box that says ‘I have opened the control panel of my domain name.’
Step 27: After the stage, you will be viewed with the MX records which you need to enter. Then you can add the documents related to the hosting and domain services provider in the given link.
Step 28: Now, tap on the ‘tap record’ option to store it. You need to do the same process till you add the five lines as in MX records.
Step 29: After completing the process, return to G suite setup and locate the box present near ‘I created the new MX records’.
Step 30: In this step, you can delete the MX records currently available pointing to the website hosting or domain name.
Note: To achieve the step, you should come back to the DNS zone editor where you need to search through the records section. You can find both the newly created MX records and the older one pointing to your website hosting name.
Step 31: Hit on the delete option to eliminate the old MX record.
Step 32: Then switch back to the setup page of G suite and click on the box mentioned as ‘I deleted the existing MX records.’
Step 33: You should save the MX records. It may differ between the types of providers. Some may automatically keep the MX records, while others require manual operation to save them.
Step 34: After saving the MX records, select the option with a checkbox that says, ‘I have saved MX records’ in the setup screen.
Step 35: Finally, to exit the setup wizard page, you should hit on the ‘Verify domain and set up the email button.
How to use your Professional Email with G Suite and Gmail?
This email account can be used just like the way you would use the regular Gmail account. Go to the Gmail website and log in to your account with your mail address and password. (e.g., [email protected])
The users have also been using the Admin console to manage your G Suite account. Here, you can have the choice to add or delete the usernames to the domain name. In this case, each user added will have separate 30 GB storage with similar features.
But the users cannot enter into the admin console. As an admin, only you are allowed to remove the users anytime you want.
G Suite Domain Setup requires Troubleshooting:
It should be noted that every web host won’t use the dashboard options. However, information about the web hosting and domain registration service providers could be located in G suite.
You can visit the setup MX records page to find your registered domain or web host in the list. You don’t need to struggle much if you can’t locate your domain name. The users are always allowed to request them to set up G Suite for the domain name.
We hope you can know about the significant advantages of creating your business mail address with the help of G Suite. What are you waiting for? It’s never late to begin the next stage in your career. So, let your mail address created by the G Suite and Gmail, and we are sure you will be ahead of everyone.
One of the fascinating things about using WordPress is the number of customizations you can use. With different themes and plugins, you can create amazing variants of a single site. That’s the reason why some sites are remarkable and others are not. Naturally, you would want to know what theme and plugins are used by that awesome site that you liked so much. Thankfully, with the availability of online tools, finding the WordPress theme and plugins is now easy. In this article, we will explore 8 different tools that can help you find which WordPress theme and plugins are used by the website of your interest.
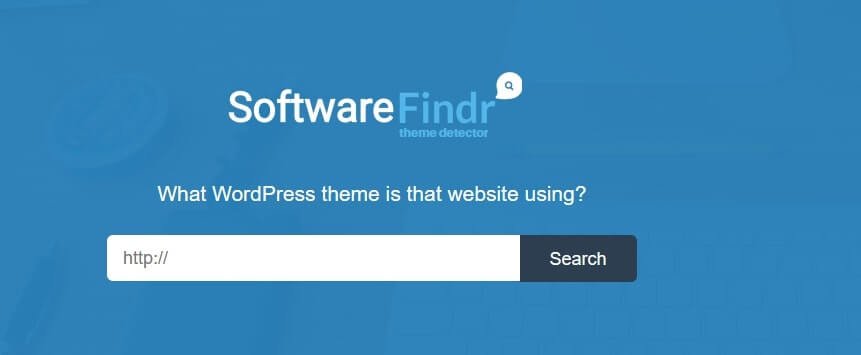
Software Findr is a very simple and straightforward tool that can detect the WordPress theme. You just need to enter the URL of that website in the search box and the tool detects the WordPress theme.
However, this tool does not give expected results all the time. If the theme is heavily modified, then this tool cannot find the theme used by that particular website. If it is successful in identifying the theme, you will also get relevant information about that theme such as theme name, author name, theme version, theme description, and more.
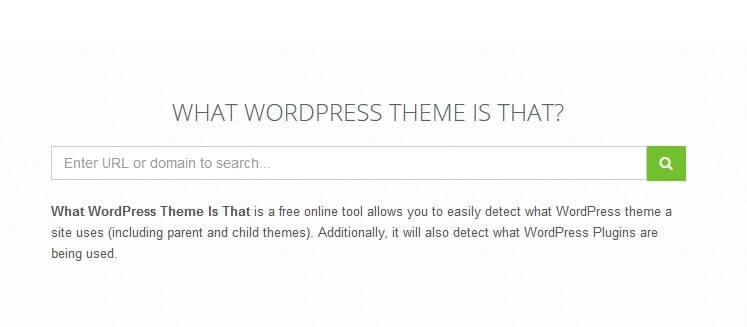
The name of this tool says it all. It finds the WordPress theme of the website you are looking for. It can also find parent and child themes. With theme detection, the tool also offers a plugin identification feature. This tool also prompts is the website is not using a WordPress theme.
This tool does not work reliably, though. You may witness that this tool does not identify the WordPress theme even if the site is clearly made with WordPress.
ScanWP is a popular theme detection tool. You can also identify plugins that are used on the site of your interest. This is a very useful tool that can give accurate results for most queries. All you have to do is to enter the URL in the search box.
You can also get the following information by using this tool:
WordPress Theme Name
The Theme Price
Theme Screenshot
Theme Tags
Name of the vendor
Theme version
Percentage of Theme Usage
Link to Buy the Theme
List of all the Plugins Used
Price of each plugin
Percentage of Plugin Usage
Link to Download the Plugin
This is a high-quality plugin that you can rely on for results.
WordPress theme detector is a very popular tool that gives you comprehensive information about the theme of any WordPress site. You just need to enter the URL of the WordPress website and the plugin immediately fetches information about the WordPress theme of that site. Apart from the theme name, it also shows the theme version, theme description as well as the statistics about the theme. You also get information about theme tags and theme provider.
WPTheme detector also gives information about the plugins used.
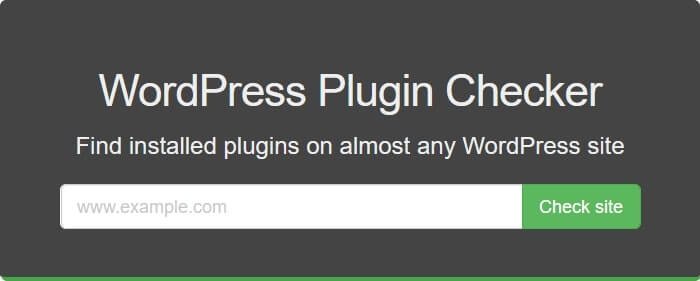
5. WP Plugin Checker
WordPress Plugin Checker
If you are interested in finding out which plugins are used by the WordPress website of your interest, this is the tool for you. This tool only finds plugins not themes. You can other theme detectors on this list to find information about themes used.
The first thing this tool does is to check whether the site is built on WordPress. Then it proceeds to fetch information about the plugins that are used by the website. You get useful information about each plugin that is listed.
WP Plugin Checker is very useful when you are specifically looking for plugins.
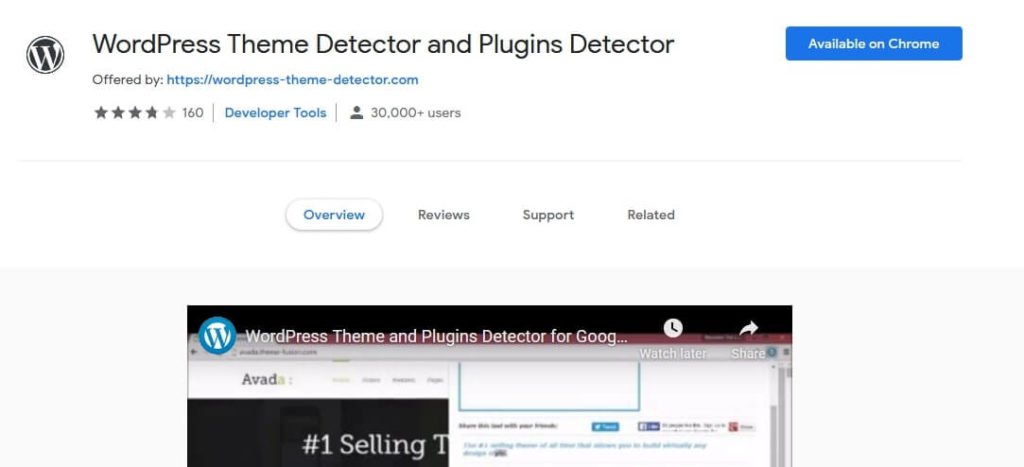
If you find it hard to look up for plugins and themes through other tools, then this chrome extension will certainly make that easier for you. WordPress theme detector and plugin detector is available as a chrome extension. Once activated, you can find the theme and plugin information whenever you visit a WordPress website. No need to enter URLs in the search box. Information is presented in a popup. The extension turns on whenever you are browsing a WordPress website. Theme and Plugin information is easily accessible by clicking on the extension icon.
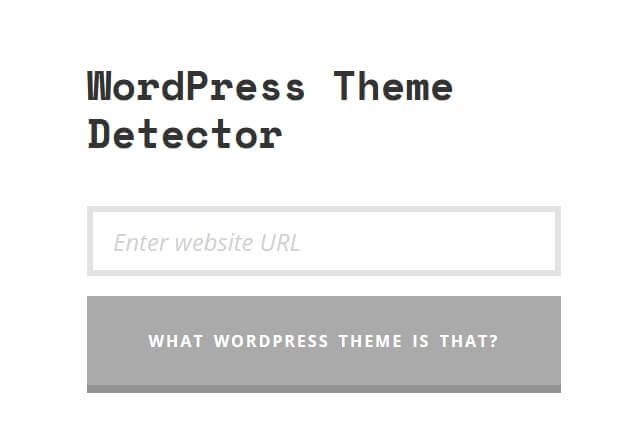
Satori Studio offers a very elegant WordPress theme detector tool. Just paste the website URL and the tool shows all information related to the WordPress theme used by that site. The focus is on the essential details only.
This cannot detect a WordPress theme if it is heavily modified or if the website uses a custom-built stylesheet.
So these were the 7 effective tools for finding out which WordPress theme and plugins are running on a WordPress website of interest. We hope you continue to explore different themes and plugins. Here are the top 70 Free WordPress themes if you are looking for a free theme. Check out this article on WordPress paid themes to know the benefits of using a paid WordPress theme. If you have questions related to any plugin or theme, do reach out to us. We would love to hear from you.
While browsing for managed WordPress hosting services, you must have come across this term called ‘staging’. If you did not understand this feature or got puzzled about what it really means, here is your chance to learn about it. In this article, we explain what staging is, why it is important, different methods of staging and finally we review 6 WordPress plugins to create staging environments.
Let’s review a common scenario with your WordPress website. Whenever you make some changes to your website, there is a chance that something can go wrong. This can happen when you update your theme or install a plugin and do something with code.
When such changes create an undesirable outcome (from a temporary glitch to facing downtime), it is often difficult to get your site functioning again. You might as well regret the changes you make. But let’s face it: change is part and parcel of running a website. Our concern is how we make changes safely? Staging is the answer.
Let’s get started with understanding staging.
Here are the things we will discuss:
Understanding what staging is and why it is so important
Staging with Managed WordPress hosting
Using localhost for staging
6 WordPress Staging Plugins to safely create staging environments
WordPress Multisite staging
Summary
Understanding what staging is and why it is so important
The word staging derives from ‘stage’, a place for drama. What happens on stage has no consequences in real life and we can try out different stories on stage. This is possible in the stage environment. Similarly, in real life, we need to make changes to our website without affecting the live site. How do we make this possible? By using a staging environment. Thus, staging is a process of creating a copy of a website where we can safely make changes to our site and try out different things before we make those changes live.
Whenever we are satisfied with a change and we see that this change has no undesired effects, then we can safely choose to apply these changes to our live site. This process is called pushing. We can push changes from the staging environment to the live site.
Staging is important because it allows us to test updates, new plugins, and theme installations and see their effects on our site. Since we create an exact replica of our site, making changes in staging gives the most accurate picture of what would happen if we make those changes on the live site. If staging hadn’t been there, we would have no way of safely seeing the consequences of our additions or updates to the website.
You will understand how important this is when you consider the maintenance costs when something goes wrong with your website. Many times, the damage is done and it is too late to recover the losses. Staging is a preventive measure that helps you avoid blunders on the live site.
Staging is also important to catch compatibility errors early on. It can save you from huge frustration later on. Given the benefits of staging, it is worth your time and money to utilize staging environments.
Let’s see how we can create staging environments.
Staging with Managed WordPress hosting
The easiest and most effective way to handle staging is to have a web host that provides a staging environment with the hosting package. Nowadays, many hosting providers offer staging environments as part of their service. If you happen to have a staging environment with your web hosting plan, then you are good to go. If you don’t have staging included in your hosting package then you ask your web host to provide you one. It is worth the extra money.
The most important benefit of having a host-provided staging environment is the ease of use. Plus, you get the support. This isn’t always the case with staging plugins. Therefore, we would highly recommend a hosting package that comes with a staging environment.
Many managed WordPress hosting providers include staging in their hosting packages. Nestify, a premium managed WordPress hosting provider, provides staging for free with every hosting plan.
Using localhost for staging
In case you don’t have a staging environment from your web host, you can also test your site locally. You can use localhost for this. Since this is done locally on your system, you do not require server space and resources from your web host. This also saves you the extra money needed for a hosting plan with staging.
However, you need to remember that using localhost is not same as staging environments. Staging most accurately reflects how changes would affect your real site. This is not the case with localhost testing. The same plugins and themes that work on your localhost may not work the same on your live website.
That said, using the localhost is useful for experimentation, development, and learning purposes. You can try out plugins, themes, custom settings, and whatever you wish using the safe environment of your localhost without affecting your live site.
If you want to know how you can manually test sites on localhost, here is how you can do it:
You need two things:
XAAMP: This is a very popular solution for creating localhost. It has MariaDB, PHP and Perl. It is available for Windows, Linux and OS X. You can download it for free from the official XAAMP website.
WordPress Core: You need a copy of the WordPress core. You can get it from the official WordPress website.
Once you have these two on your system, you can proceed with the following steps:
Step 1: Install XAAMP
Step 2: Move the ‘wordpress’ folder to the htdocs directory within your XAAMP installation
Step 3: From the XAAMP control panel, launch phpMyAdmin
Step4: Create a new database for your WordPress installation
Step 5: To access your local WordPress website, type in your web browser http://localhost/wordpress In case you have renamed your WordPress folder to something else, put that name in place of ‘wordpress’ in above url.
Step 6: You can now follow the guidelines on the screen to get started with WordPress on your localhost.
It is possible to import your live site’s database and files using a migration plugin. We will review a few migration plugins in our list of staging plugins for WordPress.
Review of 6 WordPress Staging Plugins
When you don’t have a staging environment with your web host and using localhost is not something you want to do, then using staging plugins is another option you can opt for. Here we review 6 popular WordPress plugins that you can use for staging.
This is a full-fledged plugin with a complete set of features for a staging environment, at least as close as a staging plugin can get. It can work with any web host and as they proclaim, it does not override your database during import. This is possible as it uses a unique ‘database merge’ feature.
You get to create temporary staging sites with this plugin. This means that once you use your staging environment to experiment with your site and decide upon a final version, you can push the changes to your live website. Once you do that, the plugin reminds you to delete the staging site. You can always create a new staging site when you need it.
Let’s have a quick look at the features of WP Stagecoach.
Features:
One-click staging site creation
Password protect staging sites
SSL is available on all staging sites
The Plugin merges databases. You won’t lose your content by copying your staging site to your live domain
You can choose files or database imports, or both
One-click, advanced or manual import options
Pricing
There are three subscription plans available; Freelancer, Business, and Agency. Monthly and yearly subscription is available. Freelancer plan is priced at $120 per year, the Business plan costs $200 per year and the Agency plan is offered for $450/year. Monthly billing has different pricing. It costs $12 per month for the Freelancer Plan. The Business plan costs $20 per month and the Agency plan is priced at $45 per month. You can opt for the 5-day trial to test this plugin for yourself.
WP Staging is a useful migration and cloning plugin. It helps you create a private and secure staging environment. This is a duplicator plugin that allows you to create an exact copy of your entire website for staging or development purposes. The process is very fast and you can get going with staging in seconds. WP Staging creates a clone of your website into a subfolder of your main WordPress installation including an entire copy of your database. The plugin can work with any web host.
WP staging manages to be fast by performing all the time-consuming database and file copying operations in the background. Entire search & replace of all serialized links and paths is done automatically. This enables you to quickly start with staging environment.
The plugin is available for free in the WordPress plugin repository. It has received more than 50,000 active installations. The pro version is also available with advanced features.
Features:
You own all data and it stays on your server.
The plugin is easy to use. Just install it and click on “CREATE NEW STAGING SITE”.
No server timeouts on huge websites or/and small hosting servers
Staging website will be available from example.com/staging-site
Execution is very fast – the migration process takes only a few seconds or minutes, depending on the website’s size and server I/O power.
Only administrators can access the staging website. Login with the same credentials you use on your production site.
The plugin is SEO friendly: The staging website is unavailable to search engines due to a custom login prompt and no-index header.
The admin bar on the staging website will be orange colored and shows clearly that you work on the staging site.
All database tables will be duplicated and get a new prefix beginning with wpstg(int)_.
By default, the staging website will be copied into a subfolder.
Extensive logging features
Supports all main web servers including Apache, Nginx, and Microsoft IIS
You can choose a separate database and select a custom directory for cloning
You can make the staging website available from a subdomain like dev.example.com
You can push & migrate plugins and themes to the production website.
You can define user roles that should receive access to the staging site only. For instance, clients or external developers.
Migration and cloning of WordPress multisite is available.
Pricing
The Basic version of the WP Staging plugin is available in the official WordPress plugin repository for free. You can search it by clicking on the ‘Add new’ button in the plugin dashboard and searching for ‘WP Staging’.
The Pro version is offered with 4 subscription plans: Personal, Pro, Developer, and Agency.
The Personal plan provides a lifetime license of the plugin for $96 for a single website. The Pro plan works with 5 active sites and it is priced at $150. The Developer version allows you to have 30 staging sites and costs $259. The Agency plan is priced at $540 and serves 100 active sites.
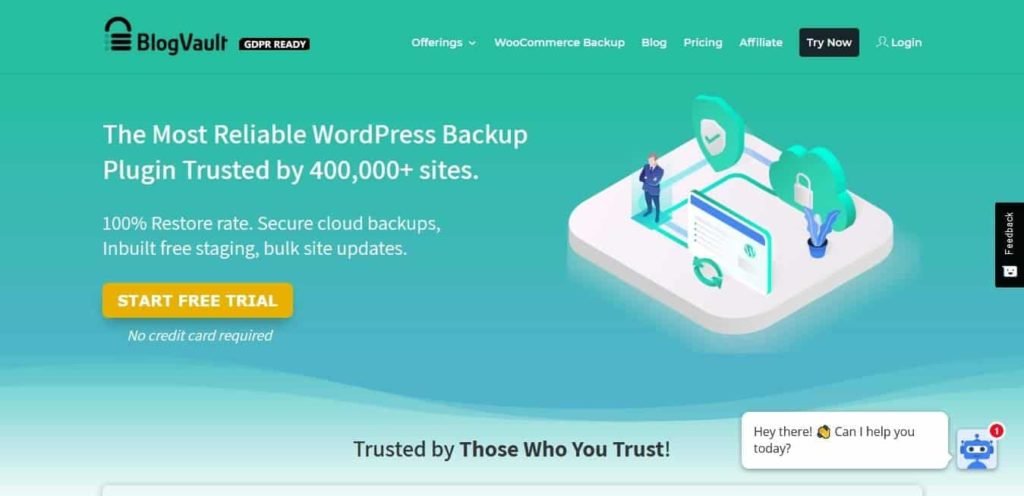
If you are thinking that Blog Vault is a backup plugin and why it is included in this list, then you probably didn’t notice that this offers free staging as well. This is a versatile solution for bloggers, business owners, freelance developers, and even agencies that need a multitasking plugin in addition to staging.
Features:
It allows you to safely test your website updates and changes.
Staging site runs on our cloud servers.
Staging comes completely free with the plugin.No extra cost for anything.
One-click Merge to push changes to live site.
Compatible & approved with 5,000+ web hosts.
Incremental backups
Perform full Restore even if your website is offline
Pricing:
There are three subscription options available as Personal (single site), Small Business (5 sites), and Developers (20 sites). The Agency plan comes with custom pricing with more than 20 sites. Each plan is further divided into three tiers: Basic, Plus and Advanced. For Example, for the Personal Plan the pricing for Basic is $89/year, for Plus it is $149/year, and for Advanced it is $249/year.
For Small Business plans, the prices are $199 per year, $359 per year, and $549 per year for Basic, Plus, and Advanced tier respectively. On the same note, the Developer plan is priced at $499 per year for Basic, $799 per year for Plus, and $1499 per year for Advanced tier.
WP Time Capsule is another WordPress backup plugin that provides staging features. It can be seen as a competitor for the Blog Vault plugin we discussed earlier. It offers incremental backups. With incremental backups, only the files and database entries that have changed are backed up instead of backing up the whole site every time. Staging is offered as a free add on functionality.
Features:
Creates an independent clone of your live production site
One-click staging feature to clone your live site and create a staging site with just a click
Apply your updates in the Staging site and once confident, apply them to your live site
Test Restores in Staging
Save time by moving the staging site to the live site after a test update or restore. You do not have to apply the same updates all over again in the live site
Pricing:
There are three subscription plans available; Business, Freelancer and Agency. The Business Plan costs $49 per year and serves up to two websites. The Freelancer Plan is priced at $99 per year for 10 sites. The Agency Plan allows unlimited websites for $199 per year.
Duplicator is a migration plugin. If you want to create a staging environment on a subdomain you have, then you can use the migration feature to move a copy of your website to a subdomain.
Features:
Move, migrate or clone a WordPress site between domains or hosts with zero downtime
Pull down a live site to localhost for development
Transfer a WordPress site from one host to another
Manually backup a WordPress site or parts of a site
Duplicate a live site to a staging area or vice versa
Bundle up an entire WordPress site for easy reuse or distribution
Perform a full WordPress migration without struggling with messy import/export SQL scripts
Scheduled backups
Cloud Storage to Dropbox, Google Drive, Microsoft OneDrive, Amazon S3, and FTP/SFTP
Multi-threaded to support larger web sites & databases
Migrate an entire multisite WordPress network in one shot
Install a multisite subsite as a new standalone website
Database and user creation in the installer with cPanel API
Connect to cPanel directly from installer
Email notifications
Pricing:
There is a basic version of this plugin available in the official WordPress Plugin Repository for free. It has received more than 1 million active installations. The premium plans are divided into 4 tiers: Personal, Freelancer, Business, and Gold. The Gold Plan receives lifetime support and costs $359 for unlimited site licenses. The Business plan also allows unlimited site licenses at $129 with 1-year of support. The Freelancer Plan is priced at $79 for 15 site licenses. The Personal plan allows use for 3 sites and costs $59.
All-in-One WP Migration is a migration plugin just like Duplicator. The difference is in the pricing. This plugin makes the migration task intuitive and easy.
Features:
exports your WordPress website including the database, media files, plugins and themes with no technical knowledge required
Upload your site to a different location with a drag and drop into WordPress
There is an option to apply an unlimited number of find and replace operations on your database during the export process
fix any serialization problems that occur during the find/replace operation
Mobile device compatible
works with all versions of PHP from v5.2 onwards
Pricing:
The plugin is available for free download in the WordPress plugin repository. It has received more than 2 million active installations. The plugin charges different extensions such as Dropbox, Google Drive, Amazon S3, URL extension, Unlimited extension, FTP extension, Multisite extension, OneDrive extension, and others. The cost of each extension is different. Each extension comes with premium support.
WordPress Multisite staging
Problems with WordPress updates can become complex with WordPress multisite networks and errors often affect a lot more than a single site. Fortunately, staging can also be done for WordPress multisite.
We will now discuss how WordPress multisite staging can be done. You need to remember that you need a custom domain to store your copy of websites as WordPress multisite staging does not work with a subdomain.
The first option is to check if your web host provides multisite staging. If you can avail this through hosting then it is the best option. otherwise , you will have to use plugins. In this list, WP staging pro and BlogVault support multisite staging.
If you are using migration plugins like Duplicator or All in One Migration, then make sure that you keep files on a custom domain.
Summary
Staging is an important process of testing changes and updates on a website without affecting the live site. We have seen what staging is and why it is so important. Staging prepares you for worst-case scenarios before they occur on your live website. We have discussed various ways to have staging environments.
Many web hosting providers offer staging environments. When you don’t have staging with your hosting package, you can choose to deploy staging using plugins. We have reviewed 6 WordPress plugins that can help you use staging for your website. Finally, we have discussed how we can also use staging for WordPress multisite as well.
We hope you now understand staging and ways to avail staging for your website through this article. Feel free to reach out to us in case you have any questions or WordPress issues. We are happy to help.
To know more about important WordPress things, Don’t miss out this article about the WordPress Maintenance Cost.
A website does need maintenance. In today’s world of constant change, you cannot just create a website and then let it sit idle. Maintenance is an essential aspect of any website’s online presence. How do you calculate WordPress maintenance costs? Here are the 7 things you should consider for WordPress Maintenance.
1. Security Monitoring
Your site needs to be monitored for security. Security monitoring includes threat-detection, malware scanning, and other security measures. Depending on your needs, you can hire a professional security agency to look after the security of your website, switch to a secure Managed WordPress hosting, or install a premium WordPress security plugin.
There is a lot of security-related clean up you might have to do if you want to keep your site functioning optimally. This can take time. You should consider the cost of this time when you want to calculate the maintenance cost.
Here are some things that you need to consider in security clean up of your website:
Users that no longer use your website
Old user database and passwords
Generating new WordPress security keys
Cleaning spam comments
Organizing content
Removing redundant tags
Clean up can be a time-consuming task. So you should consider the value of your time while calculating clean up costs.
3. Uptime Monitoring
The aim of having a website is that it is accessible when your customers (or your leads) visit. What if your website is down? You may lose a lot. Try calculating the downtime costs to get a realistic picture for yourself.
Premium services like Pingdom offer uptime monitoring as well. If you are with Nestify, uptime monitoring is included with every Managed WordPress hosting plan. Having a Managed WordPress Host makes WordPress management a whole lot convenient.
4. Speed Optimization
If you are not considering speed optimization in WordPress maintenance, then you are probably not doing any maintenance at all. Speed matters, and therefore, it is the key factor that needs to be optimized.
It is very important that you keep a backup copy of your website regularly. You may need to restore your backup when doing maintenance tasks.
You can use these backup plugins for creating backups. With Managed WordPress Hosting of Nestify, you get automatic backups and one-click restore. This saves a lot of inconvenience and headaches. As your premium host, Nestify takes care of your site’s backup and restore operation like a pro. This is an important reason why you should consider switching to Managed WordPress Host like Nestify.
6.WordPress Updates
As such, WordPress updates are free. So why do you need to consider them in maintenance costs? It is all related to the value of your time. It is not just the time of updating the WordPress but it is also about checking if everything is working fine after the update. Sometimes an update can break your site. Your site may malfunction due to a plugin or theme conflict. At such times, you may need to do some troubleshooting and figure out the best way to deal with the problem. This can include hiring a WordPress developer to deal with the problem. The same can be said if you fail to apply updates and your site becomes outdated, vulnerable to security threats. Then, it takes time to update everything and ensure that it works just fine with updates. This is also a reason to switch to premium managed WordPress Hosting like Nestify. Nestify takes care of WordPress updates as and when they happen with robust testing and customer support.
7.Website Edits
Depending on your needs, you may want to edit the content of your website’s home page, contact page, service page, or blog page from time to time. You may want to add or remove design elements, add a specific function to your website, or make some change. These are called website edits. Some website edits require professional supervision while some can be done on your own.
Like other things on this list, consider the time as well as expertise costs while calculating maintenance costs.
So these were some of the key aspects to consider while calculating WordPress maintenance costs. You can easily see that WordPress maintenance is a serious business. That’s why we recommend Managed WordPress Hosting. Try Nestify’s WordPress Hosting platform and see for yourself how easy it becomes to manage WordPress.


Recent Comments