Taking your business online is one of the best decisions you can make for the growth of your business. It is essential that you make the right decisions regarding your business website. To begin your journey right, choose the right web host for your business. There are a lot of factors that need to be considered when selecting a web host. In this article, we will explore all the factors that will help you choose the right web host for your business.
Let’s look at the factors one by one.
1. Determine Which Type of Hosting your business needs
There are many types of hosting that can be used for business websites. It is critical that you correctly identify the type of web hosting your business needs. Let’s have a look at these.
Shared Hosting
In this type of hosting, your website uses server resources that are shared with many other websites. Shared hosting is the cheapest type of hosting. It is also the riskier choice considering the other types of hosting. Since you are hosted with shared resources, your website will be affected by how other websites use the resources. This means that the performance of your website is not in your control. You may experience downtime that you cannot predict. This means you can lose your online business anytime. If you are running an online store and selling your products, this type of hosting is not for you. If it is just an informative page you are looking for your business, you can consider this type of hosting since it can do the job at the lowest price.
Virtual Private Server (VPS)
In a Virtual Private Server type of hosting, your website does not share resources with other websites. In reality, your website is located on a server where many other websites are hosted. However, resources are not shared with other websites by creating a virtual environment for each site. This type of hosting is the middle ground between the shared hosting and dedicated servers. This middle ground reflects in its pricing as well. This type of hosting is cheaper than dedicated hosting but costlier than shared hosting. VPS is an ideal solution for many business websites who want a balance between resources and pricing. If you want to avoid the pitfalls of shared hosting but cannot afford the cost of dedicated hosting, virtual private server hosting can be the answer for you.
Dedicated Server hosting
This is a type of hosting where a server is dedicated to your website, and it is not shared with any other client. Dedicated server hosting is a premium hosting solution with significantly costlier pricing compared to the other two options we discussed above. The benefits are equally compelling. You are in control of the resources you use. Downtime for your website will be minimum as extra resources can be added when the need arises.
Managed WooCommerce Hosting
WooCommerce is a popular way of creating an online store on the WordPress platform. If you are running your online business with WooCommerce, this is the best option for you. Managed WooCommerce Hosting offers the complete package that you can use to run your WooCommerce store. From maintenance to security, managed WooCommerce host takes care of every aspect. We recommend Nestify as a specialized WooCommerce host.
2. Check The Performance of Your Website with the Web Host
A slow loading site is bound to fail. In the online shopping world, speed is critical, and you cannot afford your website to be slow. All key parameters like user retention, Search Engine Optimization, Conversion rate, etc. have a relation with the website’s speed. That is why you must check how your website performs with the web host you are considering. Different web hosts offer different resources, and these affect how your website performs. You can try each web host you are considering and compare the performance. How to do that? Use the free trial offered by hosting providers. Once you get a clear idea about the performance, it will be easy to choose the right web host for your business. You should also compare the hardware and software resources offered by the hosting provider.
3. Check If The Uptime Is Good for Your Website
Uptime means for how much percentage of the time your website is actually online. You would want this to be 100% of the time. However, uptime differs with each web hosting provider. Some of them offer uptime of 99.9%, and others promise an uptime guarantee of 99.99%. You need to be careful while relying on these claims.
If your website goes down, even for a small period of time, you may lose traffic, loyal customers, and ultimately revenue. That’s why you need an uptime guarantee that justifies your business model. Maximum uptime is always desirable for any online business.
4. Does your hosting package allow for scalability?
Online businesses are dynamic and often need to consider scaling up resources. It is hard to predict a steady traffic for any time period. Sometimes there is a surge in traffic while sometimes there is hardly any traffic. When the traffic is at the peak, you can get the maximum benefit for your business. Unfortunately, if your hosting is not scalable, your website will not function correctly during the peak traffic times.
For example, some businesses make profits during the holiday season while some get traffic during the Black Friday sale. It would be best if your web host offers to scale resources during such a short period to accommodate the increased traffic.
Scalability is a critical factor that you must consider while choosing a web host. A rigid plan with fixed resources and no flexibility will not add any value to the business. Look for scalability. It’s essential for the long-term success of your online business.
5. Check the Security Features you are getting
Security is one of the essential factors in running a website. You don’t want to carry that responsibility on your own. Your host should provide security features and defend your website from threats.
Why is security a critical factor for hosting consideration? What should you look for in a web host? A secure site means that it is less likely to become prey to cyber attackers, given the number of efforts invested in the security of the website. You can always use WordPress security plugins to regularly check for malware, brute force attacks, and monitor your website for security vulnerabilities. However, you can ask your web host what security measures they are providing as a part of the hosting package. It can start with an SSL certificate for your website. SSL certificate marks your website as secure when users browse your website. This is the least you can expect from your hosting provider. Next comes the regular monitoring for security purposes. Your host should take measures for security vulnerabilities. There are some web hosts who offer website cleanup for free if the site gets infected. For the best results, you can use a professional WordPress maintenance service to take care of security and maintenance for your website.
6. How Good is the Customer Support
You will probably do not consider customer support as a big deal. Yet, it is indeed a big deal. Think about a situation where you need help regarding anything related to hosting your website. Who would you approach for help with hosting? Customer support is the answer. Customer support helps with issues that customers face. Timely, appropriate, and expert customer support goes a long way in the journey of a successful website.
How do you check customer support of your web host? Browse the internet for reviews. See what people are talking about the web hosts of your choice. Another way you can use is by testing the customer support during the free trial. Ask help for technical difficulties, negotiate pricing, or raise concerns. See how much time they take to respond to your query. You can test if your query gets resolved immediately or if you are redirected to another source more than often.
It is always a good idea to note the number of channels available for communication with customer support. Live chat, email, or phone support are among the most common options. Also, check for the availability of customer support. Some web hosts offer customer support only during the weekdays, while others provide 24/7 availability.
Customer support is indeed a critical aspect to examine when deciding a web hosting solution for your business website. Make sure you get expert and quick customer support when there is any problem. How to do that? Examine the customer support in advance. This is an essential step in wisely deciding the web host for your business.
7. How easy is it to migrate to your Web Host?
If this is your first web host, you may not need to worry about migration. Uploading your website can be a matter of concern for you if you find it difficult. You can reach out to customer support for guidance about the same. There are many tutorials available for uploading your website to your web hosting provider. However, things get more challenging when it comes to migration.
Migrating your website to your new host can be a difficult task. A mistake or two, and your website is unavailable. You may end up with a broken website, and the downtime during the transition may affect your business. For these reasons, it would be more than helpful if your web host handles the migration. Cheap web hosts do not offer free migration. However, if you opt for any one of them, you can seek help from the customer support team.
A Managed WordPress hosting provider like Nestify can offer free migration that is handled by migration experts who ensure that downtime is minimal. If you find such an arrangement with your web host, you will save yourself a lot of hassle. Migration is a tricky task that’s best handled by experts. Check with your web host how they handle the migration process.
Migration can be done through WordPress plugins as well. Yet, even with a migration plugin, it is you who have to do the migration. Why have a DIY approach to this critical task when you have it taken care of by your web hosting provider? Some offer to help, and some don’t. Stick with the ones that do. Chances are you will end up getting good customer support as well.
8. How many email addresses are offered by the web host?
Email is an indispensable part of a business website. You will need multiple emails for a variety of reasons. You should have separate email addresses for admin, staff, support, and marketing. Every web hosting provider offers a different number of email addresses. These are often included in the hosting packages. Check if you are getting the desired number of email addresses.
An unlimited number of email accounts is not really necessary. Make a rational choice of how many email addresses you need and choose accordingly.
9. Check Bandwidth and Storage
Bandwidth and storage are important considerations when you want to have an optimum performance for your website. This also means the scalability of your website during peak times.
A fair amount of storage allows you to have space to upload media files while low storage means limits on file upload. If you are running an online store, opt for an ample amount of storage. A sizable amount of bandwidth allows significant traffic without costing downtime for your website. On the same note, low bandwidth means your website won’t be up and running when the traffic crosses the bandwidth limit.
Many hosting providers specify the bandwidth and storage limits with specific numbers. Others promise unlimited bandwidth and storage. However, there is no such thing as unlimited bandwidth. Check with customer support about these claims and decide accordingly.
10. What Does It Cost
The key parameter where every decision about web hosting ends up is the cost. How much does it cost to you if you choose a particular web host? Different web hosts have different pricing, and it is natural for you to go for the web host that offers more value for your buck.
It would be best if you considered how much you are getting for the price you are paying. Cheap does not always mean beneficial. Also, costly does not always mean reliable. Look beyond numbers.
Additionally, you need to consider your requirements and the package you want to select as costing differs by the package.
Some of the questions you can ask are:
Are you planning to host a single website or multiple ones?
Which type of web hosting are you opting for?
How much traffic are you aiming for?
Are you hosting a WordPress website?
What is the nature of your website – online shopping, blog, or portfolio?
There are many factors that constitute pricing. You can also negotiate for a custom pricing if you want. You can contact web hosting providers for custom pricing. Many hosting providers offer multiple communication channels such as live chat, email, and phone so that you can reach out to them regarding your hosting requirements. Some of these channels may come at a cost or with some limitations. Make sure you consider this in the cost calculation.
These were the top 11 factors that you should consider when choosing the right web host for your business. We hope these considerations help you make the right choice of web host for your business. If you have any further questions in mind or if you need more guidance regarding web hosting, please reach out to us. We are delighted to help you through your online business journey.
Let’s learn how to convert your website into money. The best way to monetize your online content is to use Google AdSense. It is also the most popular and easiest way to earn money with your website. Follow up and learn how to add AdSense to WordPress.
Google AdSense – Introduction
Google AdSense is a network offered by Google that enables people to earn money through online content such as blogging or video. This network operates on HTTP cookies and has over 11.1 million websites registered under it. This advertising network advertises using text, image, video, or any interactive advertisement displayed on the site. Mostly these ads are targeted towards the relevant audience on the website.
CPC (cost-per-click ads) is the method used by AdSense to pay for your website. They pay you for every impression, like clicks or views. You get paid whenever a viewer clicks on the advertisement video. But the amount varies with different factors such as Ad size, Location, Device type, website quality, and few others and also the advertiser.
How to start AdSense?
To get started with AdSense, you have to create and sign up an account with Google AdSense. If you are already a Gmail user, then you don’t have to create a new account, your existing Gmail account is enough. You have to enter the URL of your website, whether it is a blog site, YouTube channel, or any other website. Provide the Gmail address in the given area and click on the ‘save and continue’ button. Later, sign in to your Google account and accept the terms of Google AdSense and create your AdSense account.
Wait for the response from Google to approve your application. The approval may take some time, extending from hours to weeks, depending on the publishers. After the support from the AdSense, you have to log in to your AdSense account. Here, you will get your ad code to display advertisements on your WordPress site.
You are allowed to place the ads on your website manually. But Google had recently added a feature called auto ads. In this new feature, you only have to paste the ad code, and Google will automatically decide and place the ads on each page of the site. Google chooses the position of advertisements on the website and the number of ads.
It is always recommended to go with manual ad placement for the beginners. Later on, you can shift to auto ads if you wish. Now let us look into both the methods.
1. Manually place Google AdSense ad code in WordPress:
Sign in and click on the ‘Ads’ tab on your AdSense account on the left side of the screen. Then switch to the ‘By ad unit’ tab. On clicking ‘Create New Ad,’ you can find three options: ‘Display ads,’ ‘In-feed ads,’ and ‘In-article ads.’ Select your ad type from these three options. For beginners, it is always recommended to select ‘Display ads’.
Give a name for this unit of the ad. This name is only for the internal purpose of your website. Select the various sizes of the advertisement provided by Google. But the recommended ones are square, horizontal, or vertical. Select the type of ads, whether to be responsive or fixed. During the start-up, it is always right to choose responsive ads. These responsive ads work well on all screen sizes and any type of device. Click the ‘Create’ button.
Now you will receive the ad code generated by the AdSense. The ad code generated by AdSense is unique for each user, and it also serves as a publisher ID.
You can use the unique code for your AMP version of your website also. Make a copy of the ad code in your clipboard or Notepad as plain text.
Use WordPress widgets to add Google AdSense in the sidebar of your website. You can decide where to place the ads in your site where sidebars are the most commonly chosen option. In your WordPress admin area, select ‘Widgets’ from the ‘Appearance’ tab. Select and drop ‘Custom HTML’ and paste the unique ad code given by Google AdSense.
2. Adding Auto ads Google AdSense in WordPress
It would be difficult for beginners to place the ads on their website. So, the Auto ads feature would be a great help to them. In this feature, you just have to paste your unique ad code and leave the rest to the AdSense. Google AdSense will place the ads on the highest paying location and decide on the ad size and type.
But this feature provides less control over the placement of the ad on your website, making it a disadvantage.
To add an auto-ads feature to the website, open your Google AdSense account and click on the ‘Ads’ tabs and then select ‘get code’ in the ‘By site’ tab. Click on that button to generate code for the auto-ads feature. You will receive a code snippet along with your publisher ID. Make a copy of the system in your clipboard or Notepad as a plain text.
Add this code snippet between WordPress’s header file to display it on every page of the site. If not, you have to add the AdSense code to every page of the WordPress website. Using WordPress AdSense plugins like Insert Headers and Footers to add the code would be the best way. The code gets disappeared when you change or update the theme of your WordPress. This could be the main disadvantage of this feature.
To use Insert Headers and Footers plugin, you have to install and activate it. After activating the plugin, go to ‘Settings’ and select ‘Insert Headers and Footers.’ Now paste the code snippet in the header and click ‘Save.’ After making these changes, it may take some time to display ads on your website.
Frequently asked questions:
Here are the few frequently asked questions and also best practices to enhance your experience with AdSense.
1. What’s the preferable size for AdSense Ad?
The best size would be 336 x 280 and 300 x 250. This will fit every screen and also referred to earn a high pay compared to other sizes.
2. Where can I place Google AdSense?
The pay depends on the number of impressions or clicks made on the ads. Make sure you place the advertisements in the most prominent area on the website to get the best pay. It is also found that the ads on the top of the screen tend to get more clicks.
Few may recommend using a floating widget, but it is not allowed by Terms and Services by Google. So, this may end in banning your website from Google AdSense.
3. What is Page RPM in Google AdSense?
Revenue per Mile is the revenue per 1000 impressions. Multiply the number of clicks made on the ad and cost per click to get RPM. The multiplier value is then divided by the total number of views of the ad page.
4. Am I allowed to click on my Google AdSense Ads?
Clicking on your ads may ban your website from Google AdSense. Google is smart at this algorithm to find the clicks on the ads.
5. Is it possible to use my existing AdSense account with WordPress?
Yes, you can use the same account given for your blog site or YouTube channel for your WordPress website by changing the type of the account. You have to provide a URL of the site while filling an application form. Open your AdSense account and select the ‘Other Products’ option from the ‘My Ads’ tab. Complete the application form after clicking the ‘Upgrade Now’ button.
6.What is CTR in Google AdSense?
This click-through-rates differs for each website. You have only access to your site’s CTR. The clicking rate depends on the website’s topic, placement of the ad, and type of audience. Follow the optimization guides to improve the pay from the ad. The built-in tools present in the Google AdSense will display a message if CTR is poor for the website.
7.How does Google AdSense make their payment?
Your previous month’s earnings get displayed on the ‘Transactions’ page. If the earning reaches the threshold amount given by Google AdSense, then your payment will be processed, and you will receive the payment by the 21st of the month. The mode of payment is Western Union, Wire transfer, Direct Electronic Transfer, Checks, Rapida, and few others.
8.Am I allowed to add Google AdSense on my WordPress.com website?
Upgrade your account to a business plan to add Google AdSense to your WordPress.com website.
9. What are the dissimilarities between Google AdSense and Google AdWords?
Google AdSense makes your website monetize by displaying ads on your website. While you can advertise on other websites, also using Google AdWords.
10. What could be the reason for the rejection of an application?
The rejection of application may be due to the violation of their terms and conditions or their policies.
11. What are the basic requirements to get approved?
The basic requirements are:
The content of your website should go along with the terms and conditions.
You must be over 18 years old.
Your website must be six months old in operation.
Even though meeting all the requirements, Google AdSense can still reject your application. So, always be cautious while filling the application form. Now you would have got a clear insight on adding Google AdSense to your WordPress website. Now it’s your turn to monetize your skills online and earn apart from your regular income.
If your blog or brand owns a Facebook page, “Facebook debugger” can help you fix various issues related to sharing an image or a post. Facebook randomly chooses the picture to show on your blog or website. This can be the least relevant or completely unnecessary image. So, if you want to fix it, the Facebook debugger can help you. This article is going to inform you about how to fix your Facebook images with a Facebook debugger.
How does Facebook gather information & the cause for wrong image preview?
First of all, we need to know what causes Facebook to show an unwanted image. So, you may be a social media marketer or a competent blogger, and whenever you make changes or updates on your site, all the information is cached. The caching done is known as browser cache.
So, what is a BROWSER CACHE?
According to computing terms, it is a short-term memory where information is stored for easy retrieval. So, Facebook uses the old cached memory when you share a post resulting in the posting of an old image. This happens when Facebook fails to take up new memory due to existing cached memory.
Another cause for ‘no image’ preview or ‘wrong image’ is your blog page doesn’t have OPEN GRAPH META TAGS. So, what is open graph Meta tags?
Open Graph Meta tags are related to Facebook’s Open Graph protocol. It controls how a URL is displayed on social media and enables any website to become a precious object in the social graph that increases traffic to your site.
SHARING DEBUGGER:
You can find the Facebook sharing debugger by either clicking this hyperlink or in the Facebook developer site under tools and control. A Facebook debugger is a free tool from Facebook; it allows you to identify the problems of sharing a website or blog on Facebook. The previews are shown by the debugger tool, make sure that you have got the correct image or caption showing when the site is shared on Facebook.
So, to be precise, the various uses of Facebook sharing debugger tools are:
It helps you find different problems related to Open Graph Meta Tags.
It shows you the preview of the site. That is how it looks like when shared on Facebook pages.
It helps to fix the errors as you come to know about it at a free of cost.
So now, you have got an idea of what is a Facebook debugger and its uses. Now you might be curious about how to make Facebook debugger work. The details are stated below.
Steps for fixing your Facebook images:
STEP-1: Clear the Cache for The Url.
The first important thing to do is clear the cache of the browser. The old cached data removal is highly recommended to avoid the pop of old or unwanted images and captions. Whenever we update a post, the cache for the particular site or post is automatically cleared. Some of the caching solutions you can rely upon for removing cached data are:
Remove the caching of a specific website or post by SUCURI FIREWALL.
Remove the caching of a specific site or post by WP SUPER CACHE.
Remove the caching of a specific site or post by W3 TOTAL CACHE.
Remove the caching of a specific site or post by WP ROCKET. So, now the cache of your site is removed.
STEP-2: Paste the Url in the Debugger Tool Space.
Open the Facebook debugger from the Facebook developer site under the tools and control section. And then type or paste the URL of the site you have to check on. Then, click “Debug.”
The Facebook debugger will preview the details/ information that it will use while posting it on Facebook.
STEP-3:Understand and Fix the Errors.
The Facebook debugger will preview the images that are supposed to show on the posting on the social media platform. Sometimes the photos will be okay as you want or expected. Still, in some instances, as mentioned before, you may encounter old, irrelevant photos. The Facebook debugger gives the details about “Warnings That Is to Be Fixed.” Some of the warnings are:
Invalid OG URL.
Incorrect images: Facebook show up wrong or completely irrelevant images. Fixing of the showing up of false images can be done by the editing of meta tags.
Old images: It is Facebook showing up the old image. The showing up of the old image is due to cached data, so fix it by removing it.
Missing images: Facebook couldn’t find the right image to show. The picture shows up only when they are featured images, so make sure that your images are all featured.
Image resolution: Facebook may have issues regarding the resolution of the images and needs fixing. The minimum size of the image is 200×200, and the resolution is 600×315.
As far as the Facebook debugger helps you understand the errors, you have to fix up the issues. And if luckily, there are no issues with your URL, lol! You can move ahead with your sharing.
STEP-4: Scrape the Url.
Once you have debugged, the Facebook debugger tool allows scarping it again by clicking “Scrape again.” You will have to force the Facebook debugger to scrape again because there is a chance of a Facebook debugger showing cached data. So, when you ask to scrape the URL again, the Facebook debugger is forced to revisit the site and show you the latest information.
STEP-5: Share It When Fixed.
Now, if you have fixed all the errors, here you are ready to share your post. After scraping again, you can finally find out that there are no errors or warnings at all. That means you are prepared to share the WordPress site with the correct image showing up.
Now you don’t have to worry about them showing up with wrong images at all! This article might have helped you to know about the Facebook debugger and how does it help in fixing your Facebook image. So, no more worries about your Facebook images. Let everyone see the best from you through various social media platforms.
After building a website for your business, what will be the next step? Yes, you are right. You should create a Professional Email Address for yourself with your domain name. Have you thought about the need for a professional email address? Creating a professional mail address would be trustworthy for your other business clients and customers.
About Professional Email Address?
Unlike regular email id, you need to create a professional email with your business or firm name. If your option is to start a business on ‘music,’ you can create your mail id as [email protected] will be your professional email id. Email plays a significant role in the growth of your business. If you fail to communicate with your customers through the mail, then it might affect your business.
Imagine the same mail address created by using the free email services from Google mail. It will be [email protected], and it doesn’t look professional, which would fail to maintain trust among your clients.
What are the steps to create your professional email address?
You can use your own Gmail professional email address with G Suite or Google’s productivity suite. If you are surprised how you could do it, we have listed the complete instructions on creating your custom branded professional email address with Gmail and G Suite.
Before creating your email address, you should get a domain name and your website. Once you get them, you can follow our step by step guidelines on having your professional email address.
Why is G Suite used for creating a Professional Branded Email address?
Nowadays, you can find numerous WordPress hosting companies are providing various options to create your email account with your domain name. However, most of them are not reliable, isolated, got many restrictions, and not secure. Sometimes, you won’t be notified of the received message from your clients. While sometimes, you can’t be assured whether your mail had been delivered to the mail account of your customer.
To get rid of these annoying situations, you can opt for G Suite and Gmail. Gmail would only helpful in creating a general email address while the G suite with Gmail is beneficial in allows you to form your own branded email address for professional use.
What do you know about Gmail and G Suite?
Gmail is the leading email industry among all other services, with 1.5 billion active users per month. G Suite comes in as Google’s productivity app suite designed especially for the business owners and entrepreneurs. Gmail is also included with this G suite and is used by both business persons (more than four million users) along with students and faculties (over 80 million users).
What is the application of G Suite and Gmail?
Making a professional mail address for your business with the help of G Suite and Gmail has come with various benefits. Some of them are,
It is possible to create the professional mail id with your domain name.
Gmail provides high profile security.
Gmail allows filtering of spam messages.
The storage of your mail account created by using G suite will be 30 GB which is double the level of mail account created by using Gmail alone.
Even though you are in offline mode, you can control the mail system via the Gmail app on your mobile.
It allows us to work anywhere and anytime with the web, mobile or tablet.
Every user had given access to 30 email aliases.
It is highly supported by the Outlook and allows synchronization with the outlook accounts.
With your professional mail address, it is quite easy to utilize the Google calendar, Google Hangout to chat, video call and voice call with your clients.
It is free of advertisements and doesn’t require professional support all the time.
It Doesn’t turn to the spam folder, efficient mail delivery with no delay.
What is the process of creating a professional Email with the help of G suite?
Here, we had explained the process of creating your professional mail address using G suite step by step,
Step 1: Sign up into a G Suite account by providing the necessary information.
Step 2: Then go to the G suite website and select the ‘Get started’ option.
Step 3: Now, you can select your plan.
Note: The price of the account will be $5 /month for a user. But if you go for a year, it will be $50 for a year where you got a discount for two months. However, if you are not convinced, you can use 14-day trial use provided by G Suite. During the period, you can check its features and advantages, including Gmail, Drive, Calendar, and others.
Step 4: On the next page, you should insert the name of your business, enter the number of employees, and the name of your country.
Note: In case, if you need the account for yourself alone, then you can choose ‘just you’ instead of selecting the number of employees.
Step 5: Tap on the ‘next’ button for further actions.
Step 6: In the next level, you should enter personal information such as your name and email address.
Step 7: Now, you have to choose your domain name. In this step, you can either select ‘Yes I have one I can use’ (if you already have your domain name) or ‘No, I need one’ if you yet to create your domain name.
Note: If you are up to create a new domain name for yourself, then you should pay separately for the process. If you have already had one, then you will be asked to undergo the verification process of the same.
Step 8: Once done with the domain name, you can now create your account by inserting a username and secure password.
Note: Choose your username with utmost care as it will be shown as your professional name.
Step 9: Now, you had completed the process of creating your G suite account. Then, choose ‘Go the Setup’ option.
Step 10: You will be navigated to the Setup screen. Here, you need to add other people to the account.
Note: In this step, you can create Gmail accounts for your employees or the whole department. You are also allowed to add members now, and then you can insert their email address later whenever you want.
Step 11: If you don’t want to add any members you can select the ‘I have added all user email addresses’ and hit on the ‘Next’ option.
Step 12: In the next level, you will be asked to verify your ownership of the given domain name.
Step 13: Later, you can view the HTML code snippet where you can add your website.
Note: Apart from this option, you can also prove the one by uploading an HTML file to your site. It can be done through an FTP client app in the hosting account.
In the absence of a website, the MX record method can also be used. Once you begin the process, you can easily continue the further steps.
Step 14: In case, you have an HTML code snippet in WordPress, change to the WordPress admin area in a new tab. Insert Headers and Footer plugin options should be installed.
Step 15: Once you activated the account, you can find the Insert and Footer page under the settings option.
Step 16: Here, you can paste the already copied HTML code from G suite, which is located below the ‘Scripts in Header’ section.
Step 17: Hit on the ‘Save’ option to store the changes made in the settings.
Step 18: Then return to the G Suite Setup section and select the tap on the checkbox option mentioned with ‘I added the meta tag to my homepage.’
Step 19: Then you should insert the MX record entries for the domain name.
Note: MX records should be only added if you have domain name and website already. But it is not needed if you create it using Google.
Note: As you didn’t create your domain name using Google, then the emails will move to the domain name instead of the Google servers.
Step 20: Hence, MX records should be changed on the domain name, and then you can receive your business emails on your Google servers.
Step 21: To continue with the process, you need to login to your hosting account
Step 22: You should add MX records in Bluehost where you should locate the DNS settings under your domain name.
Step 23: To do this, first enter into your Bluehost account dashboard and tap on ‘domains’ options.
Step 24: In the next level, you should select your domain name and click on the Manage button, which is present near the ‘DNS Zone Editor’ option.
Step 25: Here, you can open your DNS Zone Editor in Bluehost where you can return to G suite set up screen.
Step 26: Now, select the box that says ‘I have opened the control panel of my domain name.’
Step 27: After the stage, you will be viewed with the MX records which you need to enter. Then you can add the documents related to the hosting and domain services provider in the given link.
Step 28: Now, tap on the ‘tap record’ option to store it. You need to do the same process till you add the five lines as in MX records.
Step 29: After completing the process, return to G suite setup and locate the box present near ‘I created the new MX records’.
Step 30: In this step, you can delete the MX records currently available pointing to the website hosting or domain name.
Note: To achieve the step, you should come back to the DNS zone editor where you need to search through the records section. You can find both the newly created MX records and the older one pointing to your website hosting name.
Step 31: Hit on the delete option to eliminate the old MX record.
Step 32: Then switch back to the setup page of G suite and click on the box mentioned as ‘I deleted the existing MX records.’
Step 33: You should save the MX records. It may differ between the types of providers. Some may automatically keep the MX records, while others require manual operation to save them.
Step 34: After saving the MX records, select the option with a checkbox that says, ‘I have saved MX records’ in the setup screen.
Step 35: Finally, to exit the setup wizard page, you should hit on the ‘Verify domain and set up the email button.
How to use your Professional Email with G Suite and Gmail?
This email account can be used just like the way you would use the regular Gmail account. Go to the Gmail website and log in to your account with your mail address and password. (e.g., [email protected])
The users have also been using the Admin console to manage your G Suite account. Here, you can have the choice to add or delete the usernames to the domain name. In this case, each user added will have separate 30 GB storage with similar features.
But the users cannot enter into the admin console. As an admin, only you are allowed to remove the users anytime you want.
G Suite Domain Setup requires Troubleshooting:
It should be noted that every web host won’t use the dashboard options. However, information about the web hosting and domain registration service providers could be located in G suite.
You can visit the setup MX records page to find your registered domain or web host in the list. You don’t need to struggle much if you can’t locate your domain name. The users are always allowed to request them to set up G Suite for the domain name.
We hope you can know about the significant advantages of creating your business mail address with the help of G Suite. What are you waiting for? It’s never late to begin the next stage in your career. So, let your mail address created by the G Suite and Gmail, and we are sure you will be ahead of everyone.
Forgetting passwords is a common occurrence nowadays. There are so many passwords for different websites that you are likely to forget the most important one – the password for your WordPress website. What to do if you don’t remember the password? What if the password you know isn’t working? What if the email address for your account isn’t working? In this article, we will answer all these questions and show you how to recover the WordPress password.
There are many ways to reset passwords in WordPress. Methods differ depending on the access you have to your website. We will explain each method. Choose the method that best suits your access level.
Let’s get started.
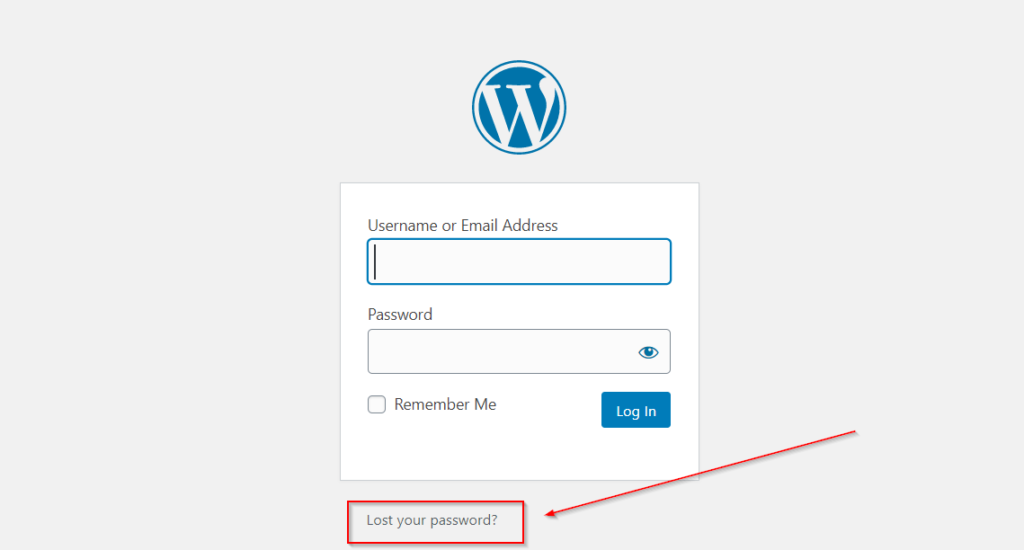
Method 1: “Lost Your Password” Link
The Fastest and the easiest way to recover your WordPress password is to use the “Lost Your Password” link on your WordPress login screen.
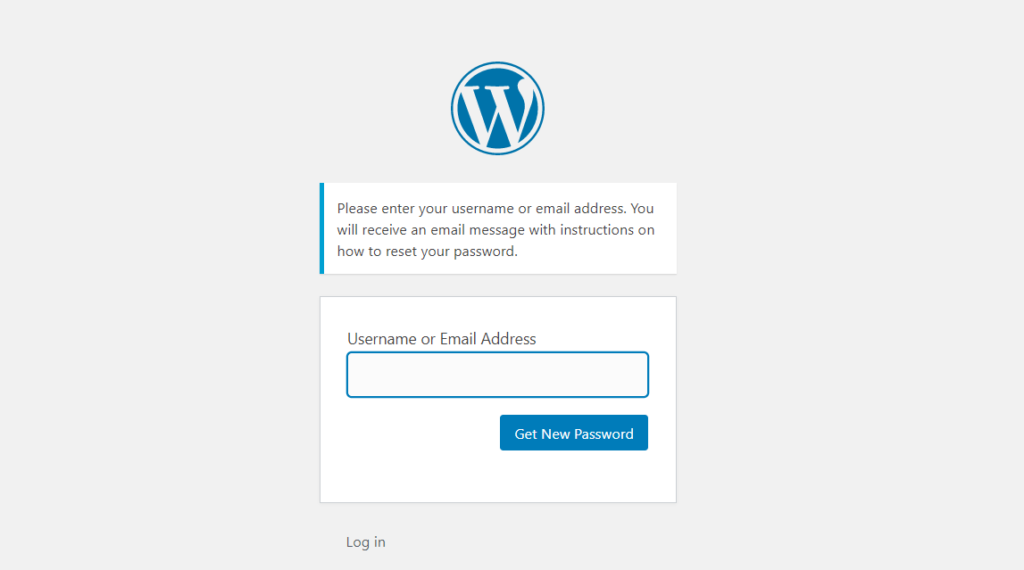
Click on the link, and you will go to the password reset screen. Here, you should enter the username or email address you have associated with your WordPress account. Once you do, you will receive a password reset link in your email.
You need to remember the email address associated with your WordPress website.
What if you don’t remember the email address you use for WordPress login? Then you will have to use other methods.
There is one trick you can use that can help you in such situations. You can create more than one user in your WordPress account. To do so, go to the WordPress Dashboard>>Users>>Add New. Here you will be able to add users. Now, create a new user with the user name and email address of your choice and give that user the administrator role. This way, you will have two login credentials that you can use to log in. This comes in handy when you can remember the other password.
Method 2: Accessing Website Through FTP
You can reset your WordPress password by connecting through FTP.
First, log in to your website through FTP.
Download the functions.php file of your active theme
Edit this file by adding the following code after the first <?php line at the beginning of the file.
wp_set_password( ‘password’, 1 );
Here you can enter the new password of your choice.
4. upload this modified file to your site
5. Once you are able to log in to your website, edit this file and remove the code you just added. If you do not remove it, your password will change with every page load.
WP CLI is the command-line interface that you can use to manage your WordPress installation. WP CLI, you can configure multisite installations without using a web browser. You can know more about WP CLI from the official website. Once you are able to use this tool, follow these steps to reset your password:
Go to the /wordpress directory and type the following to see the list of all users:
$ wp user list
2. Select the user of your choice and update the password:
$ wp user update 1 –user_pass=$UP3RstrongP4$w0rd
Replace 1 with the user id.
That’s it! You have successfully reset the password.
Other Methods
There are a few other methods to reset the password. The ones we have discussed above are among the simplest ones. If none of them works for you, try other options. For example, if you have phpMyAdmin access to your WordPress database, you can reset the WordPress Password from phpMyAdmin.
Losing your password, losing access to your site can be a nightmare. We understand your anxiety and the panic that results. Here at WPWarrior, we can help you in such an emergency situation. We offer all kinds of professional WordPress help. Do reach out if you have any problems or concerns with WordPress. We are here to help.
The simplest way to start accepting money through your WordPress website is by creating a payment form. A payment form is an interface that allows your visitors to make payments to you. You can use WooCommerce to have a full-fledged online store that includes multiple payment gateways. However, you can still accept payments without installing the WooCommerce plugin. What do you need for that? A payment form.
In this article, we will explain how to add a payment form to your WordPress website. We will review a few plugins that make it easier to create a payment form.
What Should A Payment Form Include?
1. Product Information
A payment form should clarify which products or services are included in the price. Your customers should have a clear idea of what they are getting in the exchange of payment. Maybe you are selling a T-shirt, a PDF ebook, or accepting donations, let your customers understand what they are paying for. Always provide a description of what you are offering in exchange for the payment.
2. Customer Information
You need to have information about your customers. You can add form fields like Name, Address, Email, etc., to get information about your customers. This information will be useful for accounting purposes. You can use customer information for running email campaigns and offering perks to your customers. A payment form is a very easy way to get to know your customers better. So include all the relevant fields in the payment form you create.
3. Payment Gateway
A payment gateway is the most critical part of any payment form. A payment gateway functions as an internet portal through which financial transactions are executed. The payment gateway acts like a commercial channel through which money is safely transferred from the buyer to the seller for the purchase of a product or service.
What are the payment gateways that you can use? There are popular options like PayPal, Stripe, Square, among others. Here is the list of 15 most popular payment gateways.
Now that you know the three essential features of a payment form, we can review a few plugins with which you can create a payment form for your website.
Payment Form With Forminator
Forminator is a form builder plugin created by the WPMU DEV team. It is a versatile plugin that you can use to create order forms, polls, quizzes, calculations, and more. Creating a payment form is very easy with Forminator.
Install Forminator from the official WordPress plugin repository. Once installed, activate the plugin to start using it. With a few clicks, you will be ready with your payment form. You can add details such as First Name, Last Name, Address, Payment Mode, Email, Phone, etc.
You can play with customization settings. You can quickly build a beautiful payment form with this plugin. You can add Google reCaptcha to prevent spam and authenticate transactions.
Forminator is a Stripe Verified Partner. You can accept payments through Stripe and PayPal with equal ease.
Payment Form With WPForms
WPForms is a multipurpose drag-and-drop form builder. You can create contact forms, feedback forms, subscription forms, marketing forms, donation forms, and payment forms with pre-built templates. These forms are responsive, meaning they look great on all devices. All forms are optimized for speed. Since every element can be put in place with the drag and drop interface, you can create any form on your own.
Here is a sample form.
You can add PayPal and Stripe as payment gateways. There is a PayPal Standard addon that you can use. It allows you to easily integrate your WordPress site with PayPal so that you can accept payments from anywhere in the world. A Stripe addon is also available. There is one more additional feature: support for Authorize.Net payment gateway.
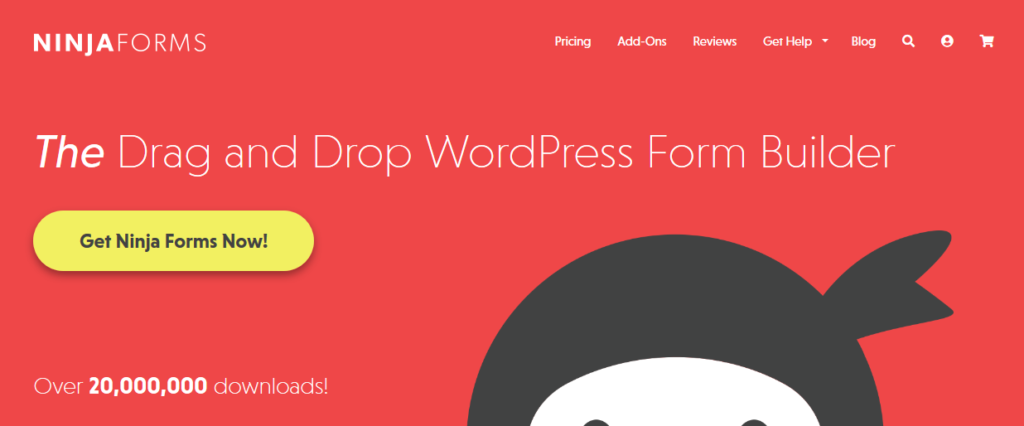
Payment Form With Ninja Forms
Ninja Forms is a popular drag and drop form builder. It has more than 1 million active installations. There is no need for any coding skills at all in order to create payment forms with this plugin. You can create beautiful custom forms on your own with the intuitive interface of Ninja Forms. This is a beginner-friendly form builder.
You can create payment and donation forms. Ninja Forms supports PayPal, Stripe, and Credit card payments. You can use versatile payment options like single payments or subscriptions, fixed, variable, or user-entered amounts.
Payment with Formidable Forms
Formidable Forms claims to be the most advanced WordPress forms plugin. It has over 300,000 active installations. It works with WordPress Version 4.7 or higher.
Formidable Forms allows you to create complex forms quickly. All the forms are 100% mobile responsive. Forms are optimized for speed and performance.
You can create a payment form and accept credit card payments right from your WordPress website. The plugin offers seamless integration with PayPal, Stripe, and Authorize.net. You can create an order form, donation form, or purchase form with the drag & drop functionality.
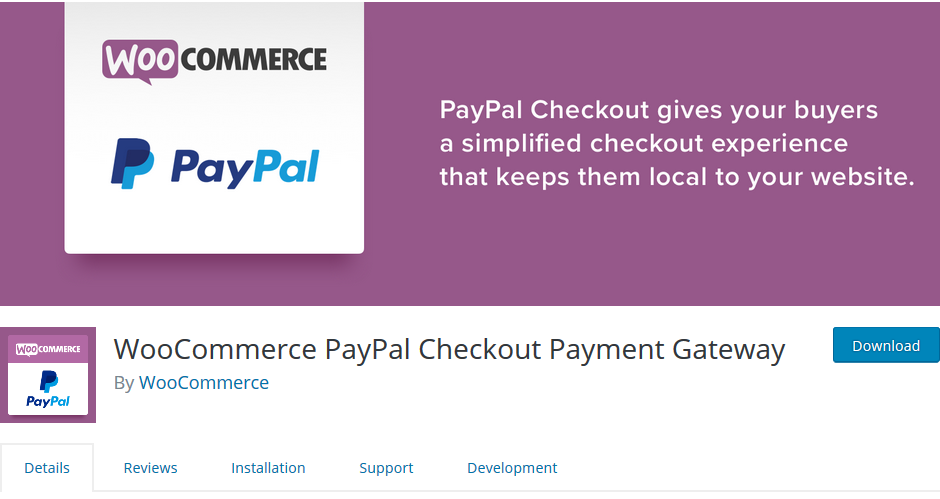
WooCommerce PayPal Checkout Payment Gateway
WooCommerce is the best way to run an online store with WordPress. We will now consider this plugin offered by the WooCommerce team. The plugin is called the ‘WooCommerce PayPal Checkout Payment Gateway’. It has more than 800,000 active installations. The plugin offers a simplified checkout experience for your customers.
This plugin uses in-context checkout without affecting the WordPress theme you are using. Payment is made on a modal window, which is hosted on the PayPal servers. With overlaying checkout forms, users can securely enter the account and payment details.
You can accept all credit and debit card payments.
We have reviewed a couple of plugins to add a payment form to your WordPress website. We have also discussed the essential features of payment forms. Which plugin are you using to create payment forms? Are you having difficulty with any WordPress issue you are facing? Do reach out to us. As WordPress experts, we would be glad to help you.


Recent Comments